
Get The Look: DIY Wood Garden Gate


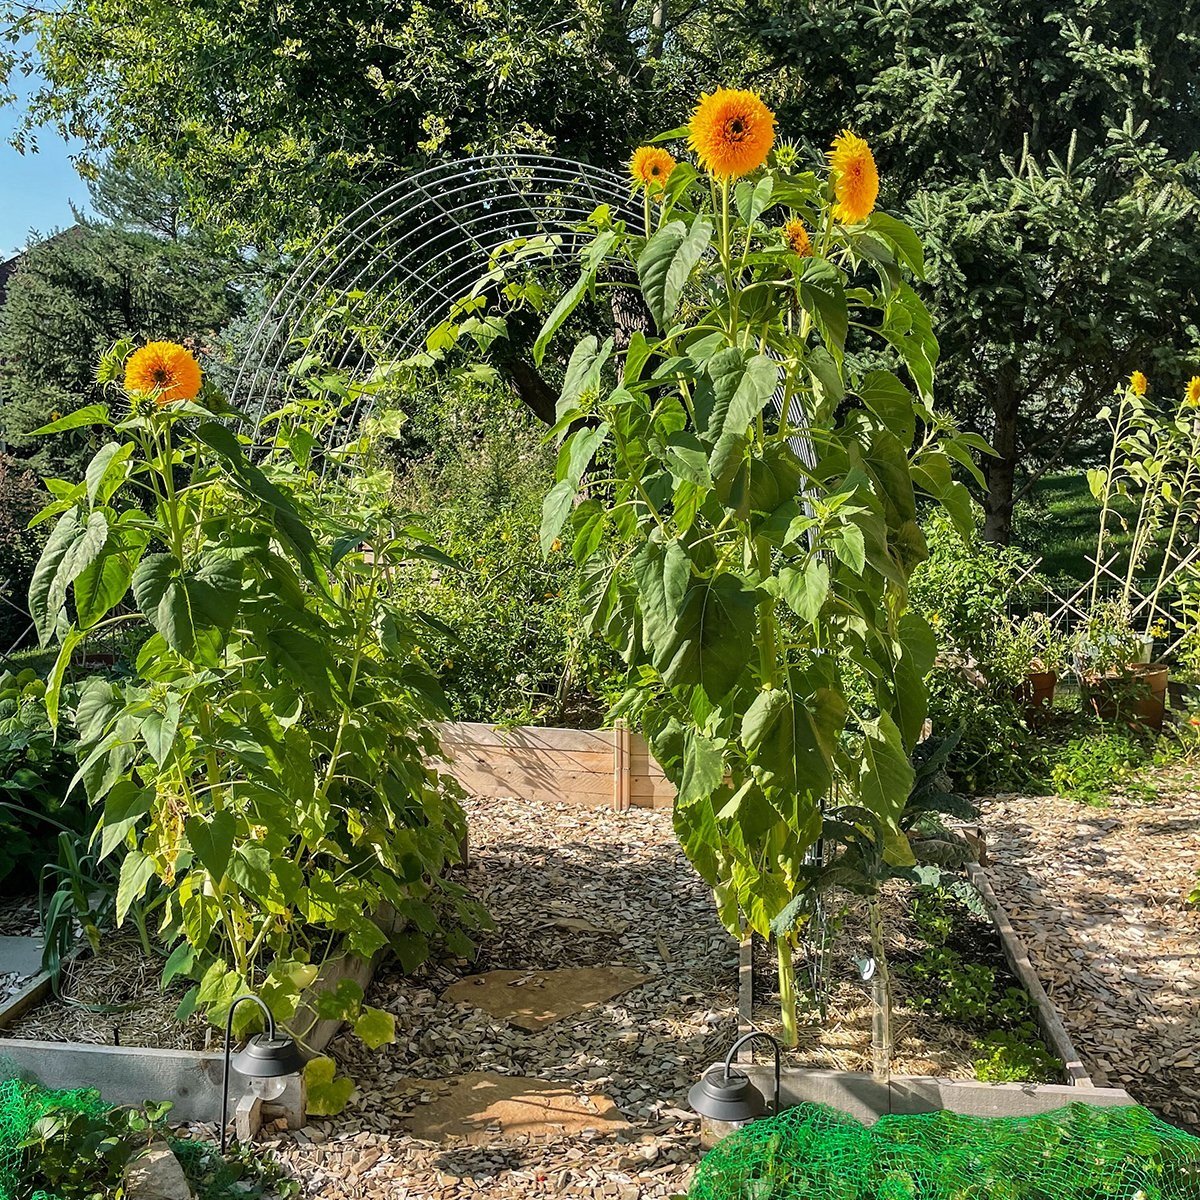
I finally have a garden gate! This is probably one of the most exciting projects I’ve tackled this season. I’m loving the English, cottage garden vibe that this brings to my space. It’s not perfect but I love it. I started with a make-shift gate made of a bamboo trellis. I’d say this wood garden gate is a major upgrade.
Creating a garden you love
No matter your skill level, there are many ways to upgrade the design of your garden. You can add signs, wind chimes, lights, and a ton more, but if you want a bit more impact, a garden gate might be perfect.
I started with just three garden beds in the middle of my backyard. Check out my how-to create a garden you love to post to see where I started and where I am now.
From a pure design standpoint, every garden needs a focal point. I have two focal elements in my garden, the gate, and the arch trellis.
Why add a garden gate?
There are many reasons to add a gate to your garden, both functionally and aesthetically.
I have bunnies and dogs constantly endangering my space so, it was really a no-brainer to add a fence and gate. Aesticially speaking the fence and gate help create the feeling of a getaway space, sectioned off from the rest of the yard. Considering I live in the suburbs, this prevents my raised garden beds from feeling like their floating.
You may not have a lot of animal traffic and have no need for a gate. Or maybe your want just want to enclose your space and create your own paradise. Whatever the reason you have to determine why garden and what matches your needs. If your want to add a gate to an existing fence but don’t know how I am here to tell you, that you can do it with very little experience, and still create something beautiful.
Let’s be honest, there’s a lot of trial by error.
I’d like to say I got this done a day or two and it went super smoothly, but really when does that ever happen. This project was very much a learn-on-the-go type project, and now I know what I would do differently but you’ve got to start somewhere right? The hardest part of this project was packing the posts tightly enough to be stable and getting the wood cut perfectly but with a little help I ended up making it all work. Gardening is a very trial by error sort of thing, I’ve learned to get better at just accepting everything won’t be perfect all the time and that’s ok. It just has more character.
Ok, Let’s DIY
Here is the step-by-step process I went through to make my garden gate, including all the tools, and equipment I used. If you love getting crafty and tackling DIY projects you can totally create your own garden gate. I should also put a disclaimer here that I am by no means a professional at building things. After watching lots of youtube and researching I was able to come up with an approachable plan. If I can do this so can you.
Garden Gate Inspiration I’m Pinning
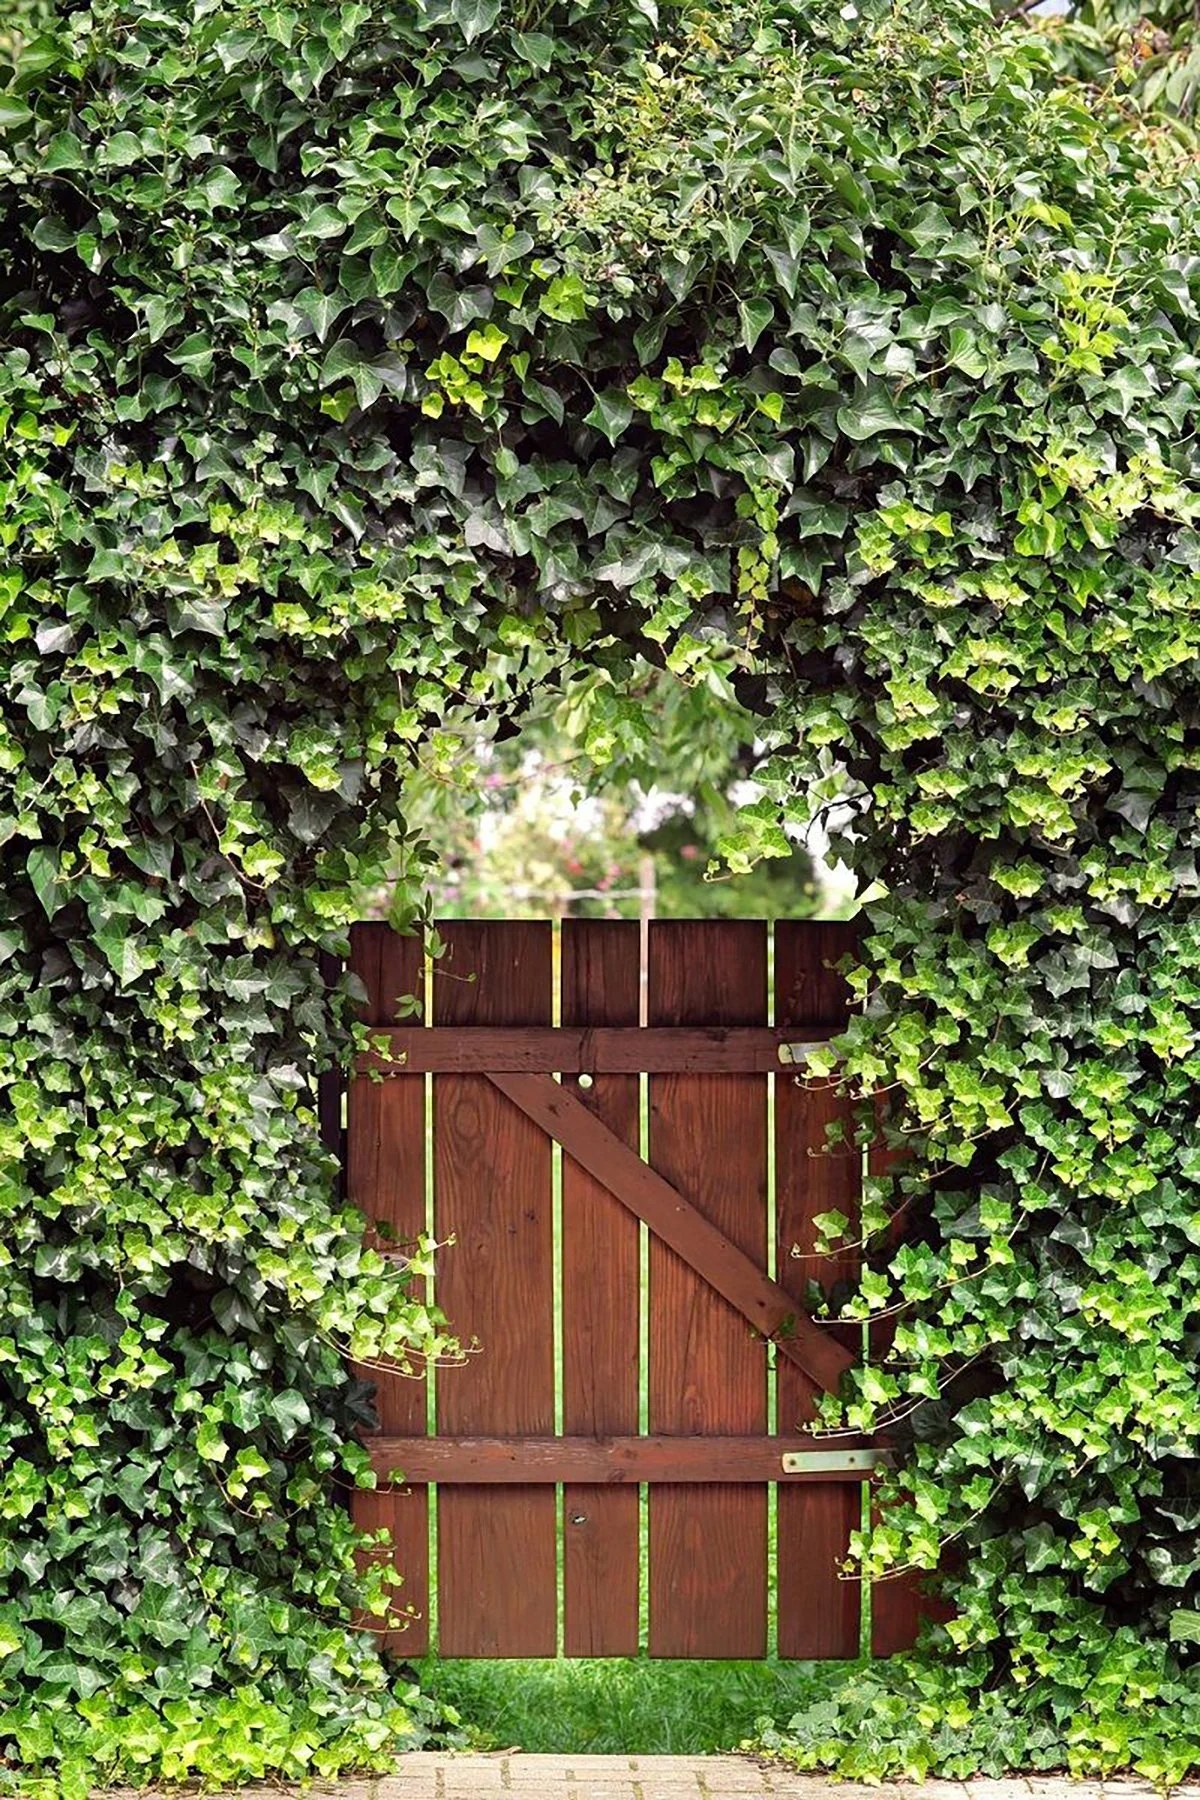


I absolutely LOVE these cottage garden vibes. Wooden gates with black hardware are so beautiful. You can create a garden entrance out of almost anything. Try old doors, wood pallets, metal, and even reclaimed materials can all be turned into gates. Want a more modern style, paint it black or like more English rustic garden vibes, add reclaimed materials. You can also play around with different types of hardware and signs to attach to the gate. Get as ornate as you’d like, brass, black, or rusted. It was very hard for me to choose which direction to go but I ended up with probably the most simple design. I definitely got lost in Pinterest for a while looking for inspiration.
A Few Bumps Along the Way
As most projects usually go I ran into some minor problems along the way. First I didn’t use sand or quick mix concrete to start. When I initially dug the holes for the posts and packed them in I used neither sand nor concrete just the native soil. This posed a problem because the weight of the gate would move the posts making them unstable. Technically the best way to set post is with quick mixing concrete. I also did some research about using sand. According to my research and several home depot employees, sand would be ok to use as long as it was packed tightly. I would suggest if you want a more permanent solution just go for the concrete. Next year I will probably end up digging the holes again and making it even more secure. Second, to make sure your gate is level place a long piece of wood over each post and place a leveler on top and adjust the posts. My gate is on a very slight hill so you may need to make adjustments for your space too.
So here are the Step by Step Instructions for how I built my very own wooden garden gate for my backyard vegetable garden.
Let’s start with what you need.

Garden Gate Equipment and Materials List
Miter Box and Saw - You can also use an electric saw to make your life a lot easier.
Wood Needed:
(1) 4x4x8ft Cedar Post
(3) 1in x 4in x 8ft Cedar (or Pine) Boards - whichever wood is most affordable to you
Wood Cut List:
(1) 4x4 8 ft long post in half to (2) 4x4 4ft long post - (Posts to attach the gate, that goes into the ground)
Make (4) 1in x 4in x 3 ft long cedar boards from the (2) 1in x 4in x 8ft boards - (this will be the Gate Frame)
Cut one (1) 1 x 4 x 4ft 2.5-inch cedar board from the last 8ft board - (Cross Bar)
Make Your Cuts First and Assemble the Frame.


Using 2 of the 8ft boards, measure 45-degree angles for the miter corners for all 4 of the 3ft wooden frame pieces to make a perfect square. Make sure they fit together nicely. Helps to use a very sharp saw for this. Next, attach the frame together with 4 screws. Go in at an angle right through to the adjacent board.


Next, using the last 8ft cedar plank measure the crossbar 4ft. 2.5 inches from corner to corner. Make the cuts on the corners so that they align flush. This will be the back side of the gate. Don’t attach this bar until you’ve added the chicken wire.
2. Add Chicken Wire and Attach the Cross Bar.
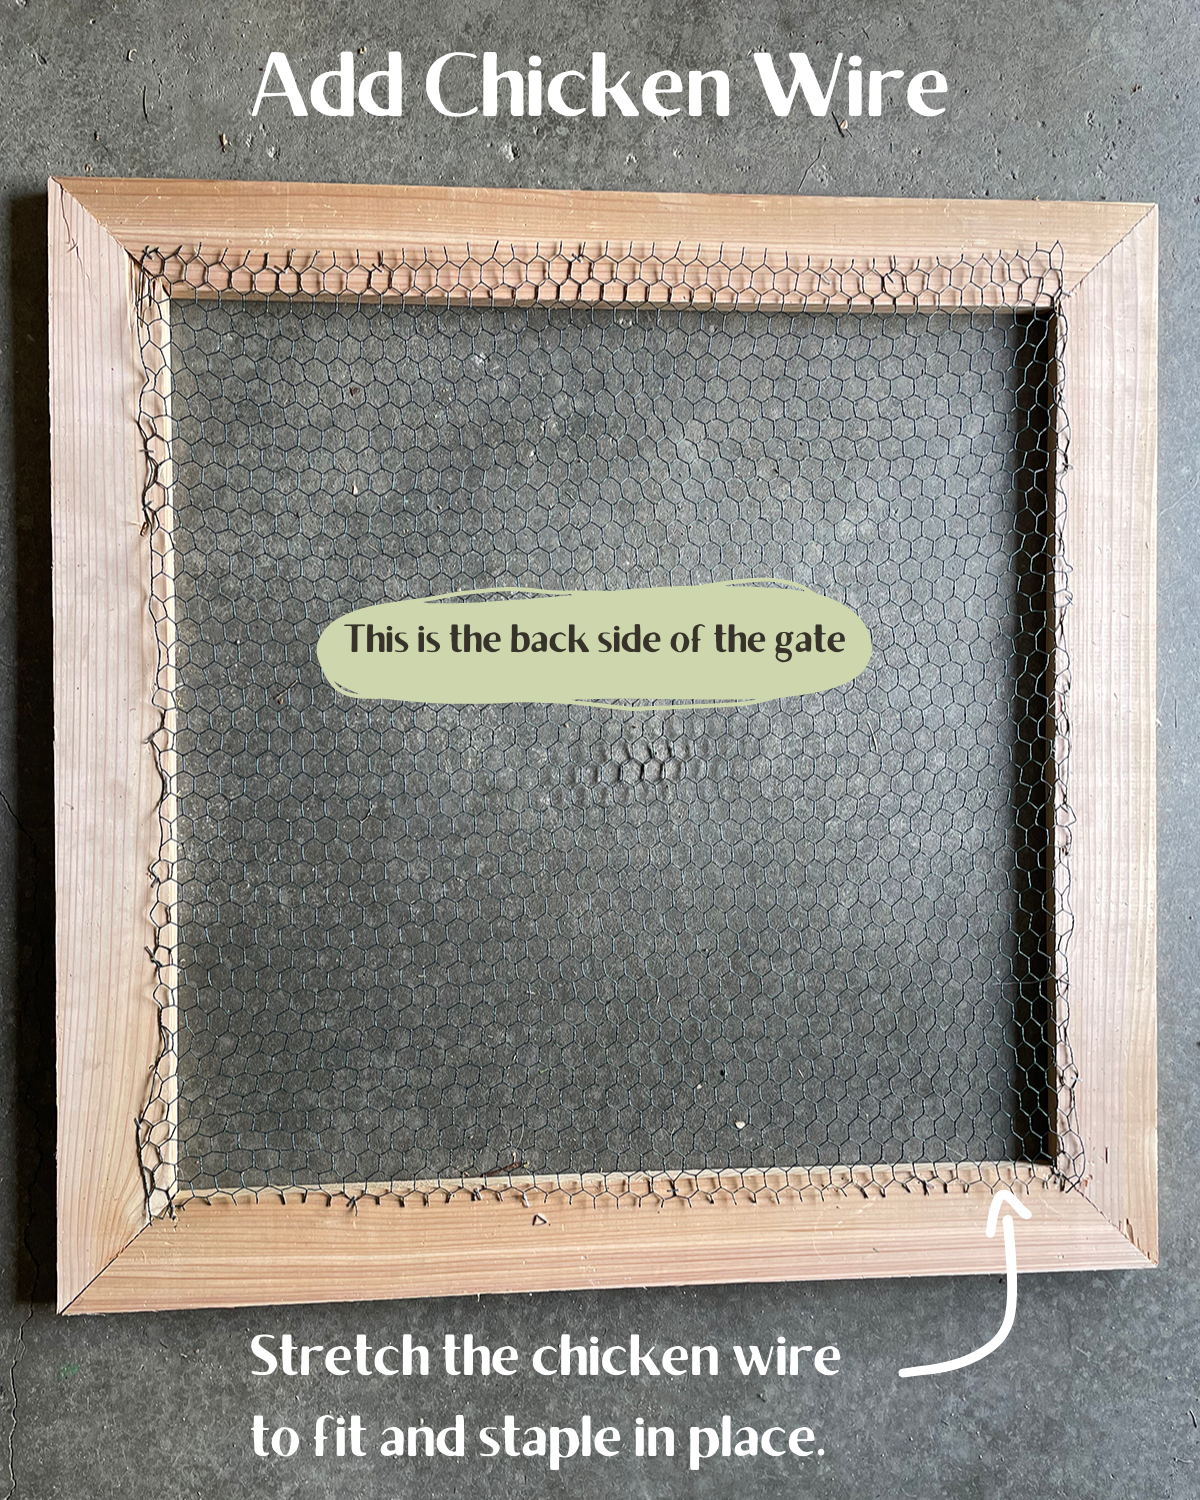

Measure the chicken wire to the frame and cut using a wire cutter or scissors. Pull the chicken wire and stretch it to fit. Using the staple gun, staple in place leaving little overlap around the edges. Then, place the crossbar over the chicken wire side and line up with the corners.


Using 2 construction screws on each end, secure the crossbar to the frame as shown above. Repeat on the other end of the bar.
3. Attach the frame to the posts.


Setting the Post: Measure the placements for your post to fit inside the 3ft gate. Remember to leave about 1/4 inch gap for the gate to swing open when measuring for the holes. Begin digging the holes about 1 foot deep so the post is sitting 3 feet above the ground. To ensure that the post sits level make sure the bottom of the hole is flat. Fill the bottom with a handful of sand and using a level place the post in the hole and move until level. Backfill with more sand, packing tightly with a mallet until level with the ground. I did this step in sections, filling with sand, packing then filling again until I reached the top. Once the post seems steady use some native soil to cover the sand around the post and pack in. Repeat on the other post.
Attach the frame to the Post: Line up the hinges about 1/4 inch from the top of the post. Make sure the gate is level with the top of the post. Can be helpful to have a second pair of hands to hold the gate steady. Then, using the screws that came with the hinges, attach the hinge to the post first then attach it to the gate. Repeat on the bottom hinge. Also important to leave a 1/2 inch gap at the bottom of the gate and the ground to ensure a smooth opening gate.
4. Add the Gate Latch Hardware.


First attach the part of the latch with the lock lever to the right post, placing it about 1/2 inch from the top of the post. Add the screws and then add the latch part to the gate frame. Find the level spot where it locks into place evenly and screws in. And you’re done! A completed wood garden gate.


